Well, here we are in August 2024 and I can report WE ARE DONE WITH THE MASTER BATHROOM!!!
What we started November 2021, when we moved Tirzah out of the "nursery" (see Part 1!!), we just finished! We are over the moon excited and I just took my first real shower in my very own bathroom this morning. Soo excited.
I detailed the first part of the process (through the beginning of 2023) of building our master bathroom in Master Bathroom Build Part 1. I started by describing the design, showing my drawings and the beginning of construction, up until the installation of the heated tile floors.
In January 2023, Gabe was tiling the floor with a black matte ceramic hexagon tile:
The floor was laid by February and grouted in March, with a cute little helper:
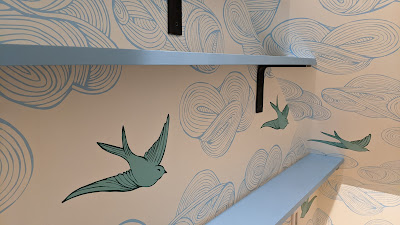
A fun little side project we worked on in February was finishing a sweet little hiding spot for the kids under the stairs in the basement. We had finished it a while back but had intended some very cute wallpaper for the space (Thanks for the inspo Abbie Halberstadt) so we took the plunge on trying wallpaper for the first time.
Here goes nothin'! It went alright ;)
It is a cute space for them--we keep CDs, audiobooks on those shelves for them to listen to stories and music in there.
Back to the bathroom :)
In May, Gabe started working on the white field tile:
I had requested the tile line up with the lowest window mullion and Gabe managed to pull it off! Check it out:
In July, I painted the walls a color matched to Behr #790C-3, but 20% lighter:
Taking a peek at the floors with the wall tiled:
After the tile was grouted, haze wiped off, with the tiles and grout sealed, we took the brown paper up and were able to install a few select things--like a TOILET!! This changed my life--to be able to use the toilet in the middle of the night instead of creak! crack! avoiding squeaky floor boards in the hallway in the night--was exceedingly exciting to me.
Whoa.
But I am getting ahead of myself. Gabe installed the window trim and sill very first.
And as you can see, next we install the open shelf, clearly because it's oh-so-important. (just a little immediate gratification I was craving at the time. Patience is not my hallmark virtue!):
The metallics gold finished steel 8" x 8" brackets were from Etsy (discontinued now), in a satin brass finish:
And of course I needed to install the DXV towel bar that has been sitting under my daughter's crib for years now (which I happened to purchase at a great discount for ~$80 on Ebay):
Also installed a DXV robe hook (purchased for ~$40 on Ebay) on the back of the door:
A little side story about the DXV valve trim that I bought around the same time from Ebay--I've had generally a good experience with Ebay but this time, after purchasing this item on 11/17/21 for around 70% off ($138), and having them attempt to deliver once when they said they attempted twice and returned the item to the seller, I was furious! It was also like the day before Thanksgiving, hence the inattentiveness to the packages being attempted delivery with a signature. I couldn't get the item sent back to us again! I was so upset. But! A few months later, after fuming for some time and shaking my head at the misfortune, Gabe found a perfectly good valve trim set, this:
in Jan 2022 on Ebay for LESS than the initial 70% mark down delivery debacle item! The new one Gabe found was $40! Talk about provision in the face of initial disappointment! The only thing wrong with it was a little bit of sharpie writing on it, which wiped right off!!! Whew! That was excitement in the making.
Other items I purchased for later, around that time (but would not install until much later!) was the personal shower set:
All the items I bought were from the Belshire DXV line except for the faucets, which were DXV Oak Hill. One thing I love about the DXV Oak Hill line is the hexagon detail on the base! Check it out:
Back to the actual bathroom. On 7/19 we installed a huge mirror and the pendant light jewelry. The mirror we bought was hanging out in our bedroom for months. Gabe used a french cleat to install the mirror, which is 58" wide by 40" tall:
The pendant lighting (discontinued now) was so beautiful to see in location! Gabe did a masterful job centering it over the mirror and vanity:
The vanity was custom painted the same color as the accent wall in the bedroom, SW 7047 Porpoise. The guy that did it did a great job--Vic from out in western Loudoun. I opted for the satin brass handles and knobs (which are hexagons!):
And now the vessel with which I will be spared the journeying into the hall in the dead of night (I know, so dramatic!):
Somewhere in there Gabe and I took the mirror off so Gabe could do a little backlighting effect. Gabe had to install a plug back behind it, built a frame to push the mirror out enough to get the LED strip in and then string the LED lights around the box so that the mirror illuminates in the dark. It's a low-key warm light that functions as our night light. I love it!
Then, 8/9 came another momentous day--the day we lugged the marble top back and forth to the bathroom (not a direct route, mind you) no less than 7 times, to ensure that Gabe could scribe it perfectly to the wall and not leave any gross gaps. Of course it was dark and probably past 10pm because, well, that's just what parents of young children do.
The next day I got a picture:
So much fun with all the details--hanging pictures in this case--I love this shell nautilus:
And then, after Gabe had hooked up the vanity sinks, caulked around the countertop, etc etc. We had a discouraging hiccup with the caulk that Gabe used around the countertop--apparently when using marble, one doesn't use silicon but latex. Now we know and we have a slight darkened ring around the perimeter. With time it ends up bleeding out to almost undetectable, but at the time it was a blow.
I got some staged pictures before we took a couple month hiatus from any really substantial work on the unfinished shower. School was about to start up and life was about to get real crazy again.
The shower stall sat unfinished for a couple months (or so we thought--it proves to be almost a year of staring!!! Sometimes I had to avert my eyes with the discouragement of it all.
Here are the staged pictures from August 2023:
And was saving my energy for the mural I was getting ready to execute in the girls room. We had spent half the summer switching the kids rooms around since Judah had been in the bigger room. The plan would be to put all 3 girls in the same room together the following summer, after Allie potty trained. Here are some pics of the finished mural in the girls room:
Detail shot of dressers with their names, just for fun:
I extended the rays over the closet and around the corner to add interest and draw the eye around the room:
And here's Judah's room too, just to even out the score. The bunk bed of his Gabe made:
The next thing I can manage to accomplish is hanging curtains in here:
Which so happens to be a set I bought for baby room decor, but I don't have a baby any more and I sure do like them here. There is a matching set in one of the walk in closets, just outside the door of the master bathroom (I have no picture).
On 9/23/23, which so happened to be the first day of fall, a Saturday, Gabe got the radiant bathroom floor heating hooked up! It just so happened to be a cooler day and it was SO welcome!! We took the rugs out and enjoyed heated floors all through the winter. Hooray!
Gabe finishes some tile edging the ceiling in October sometime:
And then somehow in the next couple of months we make a string of mistakes that cost us a whole lot of time...
Starting with Gabe grouting the marble accent tile on the back wall with sanded grout, scratching it all up. YIKES!!!
Here he is, continuing to make progress none-the-less, as we try to figure out a solution to that problem. It's almost like we are ignoring the problem, hoping it will just go awaaaayyyyy!!!
In December, Gabe works on the niche shelves, made out of the matte hexagon tile on the main floor. He accomplishes this by taking two tiles back to back, attaching them with thin-set with a small quarter in-between and sticking out the ends so it fits in the grout lines between the white wall tile. It can't be minimized the precision that was required in installing the tiles on the inside of the bump out to line up neatly level with the grout lines of the long walls of white tile--so that the shelves would be level too!! Hats off to you, Gabe.
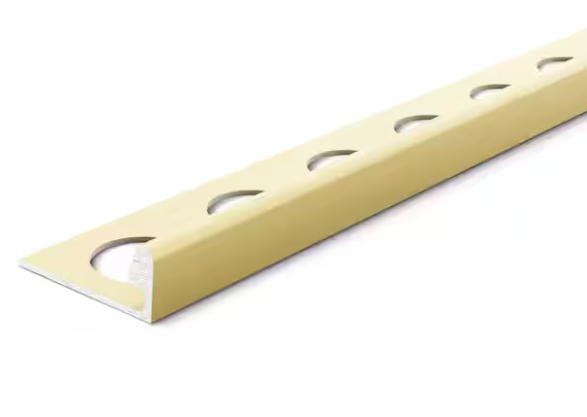
After he installs them, he can work on building up the tile in the middle section bump out, complete with the satin brass edging that was used all the way around the bathroom at the "chair rail" height:
He carefully plans the tiles in the middle section to be centered. I can not imagine how much of a mathematical beast this would be.
Here goes nothin'. You make it look easy, Gabe!
Voila!
And now, I present to you the second mistake that certainly didn't help in the progress of things...
Notice the threshold in the following image:
I had arrived home late one evening in January 2024 and Gabe was describing a detail in the shower and had to point something out to me. So, forgetting that the dry fit of the threshold wouldn't hold weight well in the position it was in, he stepped upon it, as one does when it is late at night, cracking the thing. Welp. All I gotta say is I'm glad it wasn't me or one of the kids that did it to him because it certainly took us back a few steps.
Within the next week, I went back to our friend Mark's warehouse to pick out a different slab, hoping that it would be a good match to keep it in the same family of marble.
Whatdayathink?
So, on a Saturday in February (the day before T's birthday) Gabe works again on fitting the marble threshold. Nobody step on it, ya hear? :P
He promptly cut and installed the field tiles that would clad the front and back of that step, for extra reinforcement:
Sometime in March, Gabe prepped the marble accent floor tile for grouting:
This time, after having learned the lesson the hard way, he grouted the tile with non-sanded grout. It looked great!! (no pic yet)
Later in March, he grouted the bump out white vertical subway tiles with sanded grout. Confused yet?
With the excitement of spring, sickness that wouldn't leave and pneumonia (Bethany) in April, we managed to get some fixtures installed at the beginning of May. But no luck using the shower until we get the problem of the scratched marble tile on the back wall fixed. Oh, and a glass shower door installed.
Middle of June, we had the excitement of just that:
I had been going back and forth with Roberto at Dulles Glass to get the design just right. I'd wanted to have the glass door centered with glass fixed panels on both sides, but structurally, that just wasn't the best way to go. I wanted to keep the side panel at 8 1/2" inches wide, reflecting the width of the accent wall niches. We landed on HD glass (low-iron so it looks less blue and more clear/true) and a modern black matte combination towel bar handle I had to ask specifically for, since they didn't show such a thing on their website. It ended up being the most expensive door we've ever bought, but man, does it look good!! Not only does it look good, but it functions well too--it's sturdy and watertight. Whew!
Now to solve the problem of the badly scratched marble tile on the back wall. It can be seen in the pictures to be not quite as dark black as the floor tile (it's the same marble tile) because the scratching took off the matte luster and made it look more gray and dull. We thought maybe there was a product that could be applied after Gabe buffed the heck out of it. But in the end, Gabe decided to tile right over it. This would include cutting the white tile edge at the back so new tiles could fit in behind them. That part was actually going to really help because I was worried about the uneven nature of those tiles in the corner and a big gap---this would solve that problem!
So, with a sigh of resignation and equally a sigh of relief, a decision had been made and a problem solved. We were off and running again. I immediately got on the horn to order more of that marble tile. Not an inconsequential amount, but still glad to be moving in a positive direction again, after being derailed from the finish line about 5 months. Surprisingly, the tile arrived very quickly! But! there were things to be done in the meanwhile.
In late June, it was a seriously messy job to cut the white subway tile at the corners!!! So.much.dust. on a previously imagined ALMOST DONE space!!
After the messy part was done, Gabe fed a hose in through the window and sprayed the whole thing down. That was handy!
I'm not supposed to post this pic. But he's so cute! tee hee. And it was his birthday :D
The next day, here he is, carefully taping down some paper to cover and protect the finished marble tile floor:
Meanwhile, I had been shopping for a narrow cabinet to go in the spot behind the glass door:
After a trip to MI for the 4th of July, we had planned to move all 3 girls in to the same room. Allie potty trained, check. (or mostly check) Gabe to modify some solid wood bunk beds (here and here) he bought off Wayfair. He had to modify because the room is too narrow to have two full size twin mattresses end to end. Truth be told, we cut 6 inches off the memory foam mattress we bought for T's bunk..! But who is going to know. She'll be out of it by the time she's tall enough to care anyways.
The finished product in mid-July:
The girls were so excited!
After that delightful little detour, he was back at it in the bathroom--starting up the process of tiling over the existing marble accent tile:
It already feels like so much of an improvement...
And grout, THE NON-SANDED kind, please!!! :) I'm not shouting, I promise.
After I spent some time sealing the tiles and grout lines, I taped the edges so it would make it easier to caulk (and it would look more clean):
So.much.tape.
Dun da da dun!
I cleaned and staged up the whole bathroom for the occasion:














I just finally got this all read, first needing to read Part 1 (which I somehow managed to miss at the time!), thoroughly enjoying your writing style and being even more thoroughly stunned and impressed with the level of detail you two went to to create a simply exquisite master bath. It boggles my mind. And makes me appreciate so much more the artistry and craftsmanship that went into that room, which I'm going to have to study in better detail next time I'm there. I confess I tend not to notice the details as much as I should to truly appreciate the overall charm of the room, and what it took to accomplish! And the time and setbacks it took to get there!! (Not to mention the time and pains it took to set this all down in fun narrative and illustrations!)
ReplyDelete