I have to admit, I've been holding out on you. The reason I've been so delayed in writing, well, it's simple, really. I'm PREGNANT!!! We are expecting a little girl in late February.
A 24 week bumpie, for those of you that like that sort of thing:
The first half of all of my pregnancies have all been rough for me, and this one is no exception. Needless to say, blog posting was not very high on the priority list for quite a while. Not to mention, seeing things 95% of the way done and feeling as though they should be all the way done before "presenting" them was also a factor. We are much closer now, with more to tell :) So, here we go!!!!
Considering where we left off
last time, contractor Dave had been bricking over the windows in the master bedroom to finish up the exposed brick look. We were using the interior bricking over as a test run for the mortar, to see what we should use for the exterior facade. This is the kind of detail we are talking about:
Inside lighting:
Daylight (it matters):
I had also been shopping around for brick to match the existing brick on the outside. This proved to be a long process, because the mortar took a couple of weeks to really dry out to make a decision. Then, once we decided, the special order mortar took about a month to come in. So, process was slow in July and August. Dave was getting close to the end of projects on the inside (I had asked him to prioritize the interior) and when he moved on to the exterior (in July), we got a LOT of rain! Dave ordered our siding, but come to find out, the size I wanted (7" instead of 8" stock item) was something that needed to be ordered and would take weeks to come in as well. We were waiting on the garage door order to come in too. So there were a couple of weeks we were on stand-still. Which was frustrating.
Around mid-August, the garage doors were scheduled to arrive and be installed, and we were excited! Dave had been working on drywalling the ceiling in the garage, and overall prep for garage doors. Here are a few shots of the prepped space before the garage doors went in:
And you can see the large piles of existing brick waiting around for the day they can be installed...
Large garage door being put in:
Voila!
Working from the inside on getting the electrical components of the automatic opener working:
And from the road:
It's hard to see the black doors--they just look like black holes! But, trust me, they are up and we love them.
Dave also got started around that time working on installing the fascia and trim around the gutters and windows. I had decided on black for all of these. Sherwin Williams 6258 Tricorn Black to be exact.
I'm sure I am forgetting other small projects along the way that were accomplished during this time. I remember Dave fixed the leaky roof flashing so when the big rains (~5" of rain one night around our daughters birthday!) did come, we didn't have to move our original painting off the back side of the fireplace anymore :)
Dave finished the siding on the west wing way before the east wing, since we didn't have to wait for the brick work to happen first. We decided not to put brick on the foundation of that side, just parge the concrete block with a smooth concrete, stucco look:
Here's this side the house with the new siding going up! Yay!!
Later, all finished up :)
The siding was a 7" wide Hardieplank in "Sandstone Beige" to match the mortar color. I think it turned out great, and I was excited to see what the rest of the addition was going to look like all clad in the same!!
We had the garage side door installed in early September:
One current problem we are still trying to solve that we thought would fix itself when the gutters went in--a wet and leaky garage. After a significant rain (which we've had more than our fair share this year), the southern edge of the garage floods. And, some sad carnage from this fact: we left three usable cabinets over there for a couple of months without moving them out of floods way, and the bottom one has some significant mold growth on the bottom that Gabe will have to replace. We plan to use those three cabinets in a kitchenette we want to incorporate in the mud room once Gabe gets them all cleaned up and repaired. This is a project for a later date though, to get our basement in better shape to be a guest suite, complete with two probable bedrooms (one a current "man cave" and the other a sizable room with two closets), a walk in bathroom, and a kitchenette/mudroom.
Overall in September, we got around 8 inches of rain, which is almost 5 inches above normal!! It just so happened that affected our schedule, in terms of being able to start on the brick when the materials arrived. Dave lined up a subcontractor to get started on the brick work, but rain delayed its commencing.
I sourced two different shades of brick from two different relatively local suppliers. From Frederick Block and Stone in Winchester, VA I got #455 and from Potomac Valley brick in Lorton, VA I got Harbor #607.
Piles of said material and a cute girl:
For the mortar, we bought from Frederick Block and Stone again, and it's called "Grain", but we customized the color by adding white to lighten it up in a 1:3 ratio (white to "grain") as well as adding additional sand to it.
I'll start commenting on the brick work, but first know that working with this particular subcontractor was one of the biggest frustrations of the entire project. Dave had originally planned to do the brick work himself, but with all the delays throughout the summer, he finally decided to go with a guy who stopped by quite frequently asking for the work. He calls himself "Hotrod". With many no show days, much lack of communication, lying, not cleaning up the mortar of the face of the bricks when he was finished, weird comments to me and some shoddy craftsmanship spots (he generally did good work, but it seemed the craftsman missteps could have been avoided with a little more care) there were a few occasions where he was about to be let go. He started working Sept 20 and was still finishing up some issue spots (touch ups) around the first of November!! This was after he said he would need a few weekends to finish the project....aaaaaahhhhhhh. Somehow he made it to the end. And so did we. ;) Ok ok, pictures.
Here we go, starting on the east wall:
He did work in the rain (under tarps Dave set up) a couple days, so that was to his favor:
All cleaned up (later):
Moving on to the north side of the house, around the corner (Dave did the foundation brick work supporting the red brick masonry):
And a brief view of the siding going up on the east side:
I should mention that after all the work Dave did to clean the existing brick to use, we didn't use much of it. We had about 700 bricks saved (all those piles you saw) for months, but only ended up using about 200-250 of that for the small side of the house that wraps around and literally touches the existing brick on the existing part of the house. It just wasn't going to work to "feather" in the new brick with the existing brick. It was a different size by about a 1/2" in length and I think even a little bit in the width too, which definitely would have been a problem. Thankfully, we had bought enough new brick (or could source easily more) to cover the whole thing, without having to wait around for more materials to be ordered. Whew.
Moving on to the little chunk of brick right adjacent to the existing building:
Finishing up:
About halfway through the finishing up of the brick, Dave was able to start on more of the siding on the east wing of the house:
Also, around this time, we were running drain pipes out from the house in preparation for gutters going in. This took a lot of earthworks!
This next part I cringe, remembering the mess! Thankfully, we had a good week of no rain and wonderful sunny weather. But, it was on the tail end of a rainy week, so there were some things we could not accomplish with the large backhoe.
Certainly there were many backhoe tracks that left their mark on our yard....:(
Dave getting stuck in the back lot, where we were depositing brick rubble debris and extra dirt:
It sure was soft! It's a wonder Gabe didn't get stuck when we went back there to do the same thing the day before.
A boy and a tractor.
A fun video where Gabe was letting Judah ride with him:
Gabe used the back hoe for most of the digging for the drain pipes, but did end up having to hand dig some:
Such a mess!
Mid October, Dave had some guys come out to prep for our large concrete pad, just outside the garage doors-it is to be 30' x 40'. Gabe had to take down the original location of his basketball hoop. But, he is very excited about having a more sizable area in which to play!
This was such a fun day, watching the concrete trucks come in, pour and smooth the concrete!! They did an excellent job!
Three concrete trucks later:
Ever wonder how they get that brushed texture? A push broom!!
What a day! We had other things going on at the house that day too--when the concrete pad was done, the men kindly used their smaller machines (smaller than the backhoe we thought was too big to use) to grade the house around the west wing addition.
Of course the machines were long gone when we were poking around up there:
Later still in the day, he got to it, grading the driveway as well:
Gabe likes to say he has such finesse with that machine, it's like he's "frosting a cake" when he spreads out the gravel!! lol.
Also, the brick mason was there working on the other side of the house, down in there somewhere:
There is also a large pile of top soil deposited here, for when we are ready to spread after grading.
Here's a better shot of the site where brickwork progress was being made:
Well! I just can't believe all the progress that was made that day!! What a high.
The concrete guys came back the next day, and finished off the grading with their machines. And just like that, our horrible muddy driveway was overhauled!
Overall, I had been really happy with their work, minus two sad casualties: a small pine sapling I planted in the side yard that come completely bulldozed and a larger catalpa tree (that we had seen take up a good deal of growth in the last couple of years) get run over as well. We'll see if it makes it next spring. Besides the fact I had looked at our to-do list earlier that day realizing how far we had come but just how far we need to go with things before the baby is born....And then crash off the high. Oh well, gotta take the good with the bad, huh?
Over the next week, much progress was being made.
Exterior lighting fixtures:
Yay!
Finishing up siding, black trim, grading, adding top soil, and GUTTERS!!!
Don't they look sharp against the brick????!??
BOOM!
And from the front (please excuse the yet-to-be-cleaned brick job):
WOO HOO!!!!!
Such a long time comin'!!! Initial visions being realized before our very eyes. Whoa.
Remember??
:D
We got some landscaping, in our NEW (to us) minivan (ahhhh...what, I have a minivan?!):
Judah looks thrilled.
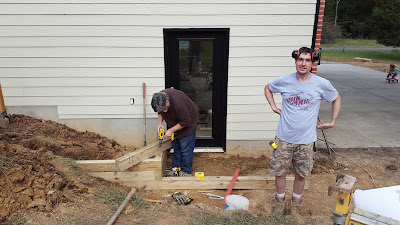
Gabe got to work (with my dad's help) building a retaining wall in the back of the house for garden beds down the road.
Here's the site I'm talking about:
The next weekend, Gabe worked on the backsplash on the west wall of the kitchen, with a cute and curious little onlooker:
I guess that is a little more than a backsplash. Yes, we are cladding the whole wall. Welcome to the subway! :)
As you can see in the next pic, the section of tiled wall next to the cabinets will have a hall tree in front of it.
We still have to grout the tile on this wall. Then, off with the cardboard (there is a little snippet of it showing in the last pic), forever!!!
Another thing about this hall tree: we'd like to replace the faux/cheap wood look with walnut inserts, down the road. And attach it to the wall. That will be interesting!
Additional to doing backsplash tile that last weekend in October, we moved Zoe's furniture up from our (temporary) bedroom downstairs to her new room (we had my mom and dad's help that day, with the kiddos and moving things) upstairs! We had been putting it off, worried about her adjustment right up there next to Judah's room, but she has done better than I thought. And now, all her things are in ONE place! Oh, and it's nice to finally have our room to ourselves again, after over 2 years. Well, at least for a couple months, until the next baby comes along! :P
Here is her room, all set up, with her things:
And then I'll just pan around from right to left:
Next, lets take a little tour of the great room/dining room/kitchen space. Judah had a small birthday celebration at our house the next weekend, so naturally, it was clean and neat--perfect time to take some pictures!! Be prepared for a barrage.
First, the great room space:
Moving into the dining room:
I like this picture because it shows the beam off well:
I chose to go with a medium tone stain for the ridge beam because I thought it was more mid-century. Also, when we go to re-sell, I think more moderate tones would be better. Gotta keep those things in mind :)
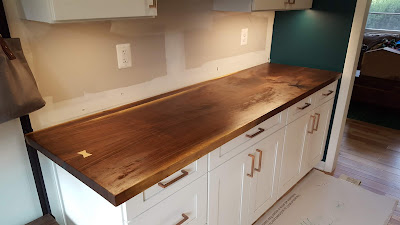
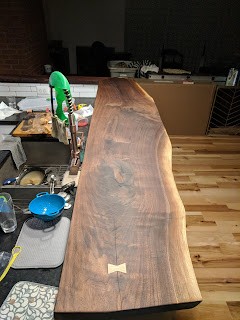
And lastly, the kitchen I designed!!! We are pretty proud how these walnut surfaces turned out. Check it out!
View from the sink into the great room:
View from the sink into the dining room:
View from the back deck door:
Panning right a little:
View of the west wall:
It still needs to be grouted and sealed.
And a detail of the bar top:
Check out
my latest post with details about the walnut countertop and bar top here!!
We got the final inspection this week! Yay! We were looking back at our first day breaking ground on this project, and it was November 11th, 2017!! Wow! A few days off of a full year.
Day 2, November 12, 2017, for a little walk down memory lane:
I'll be posting soon with details of the master bedroom wing, all finished up.
And that's all for now!!


