Showing posts with label level. Show all posts

Saturday, April 28, 2018

Who likes Demo Day anyway??

Remember our cliffhanger, a cleared out, mangey, short shelf life of a kitchen???  The one I want to be done with in place of a wonderfully larger, bright and more functional kitchen??  Yeah, that one.  Well, here we go!

I had appointments last Monday morning (April 23rd) with the kids and contractor Dave got started demoing the kitchen first thing.  I wish I could have been there to see it come down piece by piece, but that just wasn't in the cards for me in this stage of life!!!

Out with the old:


In with the.....new?  Wait...not quiiiiiite yet.


Was:


Is:


Before removing the wall:


After, a little closer up, having already removed the wall:


Another view:


Old materials all loaded up to go to the dump.  A leeeettle bit bittersweet with those interesting countertops, but not much.


A couple of days later, we received the cabinet delivery:


Our new cabinets are the same ones we used in our first flip house.  They are Forevermark cabinets, called Ice White Shaker we got from NextDay Cabinets.

Once old drywall was removed from the space, the first order of business was to rewire electrical and plumbing to accommodate our new configuration.  Not too exciting, but very necessary!  I'll show a couple pics:

Dave installing recessed can lights in kitchen
Finished installing recessed lighting in kitchen:


Notice some of the plumbing is done for the sink in the peninsula:


In the next picture, it can clearly be seen that the doorway has been shifted to the left:


We are replacing the back deck door with a sliding door, so light switches had to move a good deal to the left:


The window behind fridge is also being replaced.

Before Dave could drywall over the new electrical and plumbing, he needed to get inspections for each of those.  Plumbing passed right away, but there were some hiccups with electrical (persnickety Loudoun inspectors, argh) so it took an extra day for that one.

Here are a few pics of the drywall going up:


Look at all the holes in our living space!  We had to move the TV downstairs that was mounted to the wall just to the right of the new location (hard to tell since it's also covered!!) cased opening to the kitchen:


Mudding and taping and partial removal of old flooring:


Oh!  And the first cabinet being installed.  Can't forget about that :)  Notice it had to be cut on the back to accommodate the stairwell height requirement down below.

Another shot of two layers of flooring and one layer of sub-flooring removed:


More cabinets going up!


Drywalling the pantry:


Lots going on in there right now!


Then, Dave removed more of the old flooring, and a strip of the diagonal-sub-flooring so he could get the old and new more level:


He's also prepping the sink base for installation :)


Some final pieces of drywall installed on the ceiling:


More and more drywall going up all the time!


Oh hey, the last couple windows came!!


Windows going in:


Over a two day period:


Voila!!  Muah!!  So much light a'gunna come in!  We'll really be able to see just how much after we paint and we can remove the plastic off the glazing.


Cabinet under the window and the one over the fridge has been installed:


Dave installing wall cabinets flanking the stove:


We had our fabricator come out last week to take measurements of the cabinets for countertop installation in a couple days. Yay!! Things are really moving now. Here's hoping the kitchen will be functional and ready for use in a week or so.
Lookie there, it's starting to look like a kitchen!!!!!!


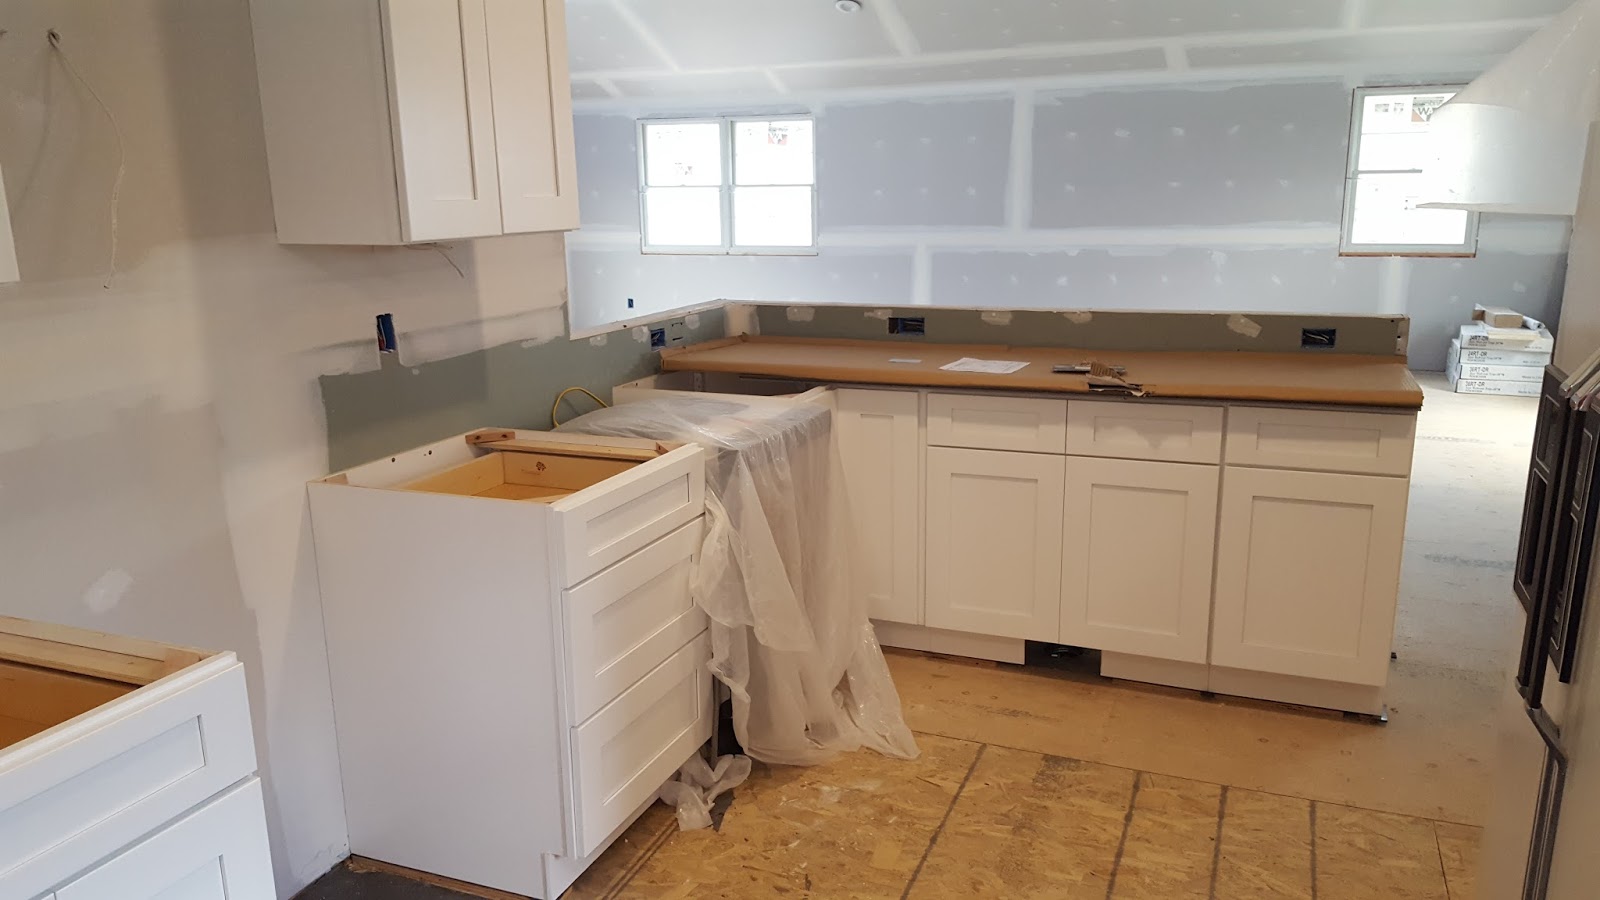
Now if only that dern refrigerator was pushed back into place :)


As it stands, we expect the back deck door slider to arrive any day.  Backsplash tile will be delivered tomorrow to be installed this weekend by Gabe IF the granite countertops are installed later this week as hoped/semi-promised.  Hardwood floors are on target to be delivered late this week or early next week.  Appliances arrive next week!!!!!!

Well, that's all for now, folks!!!

More updates to come....


Tuesday, February 12, 2013

Moving Forward with Millwork: Cabinets

The weekend of the 26th of January, we had Gabe's cousin Andrew in town.  What fun we had together!!

During the week, cabinets arrived and sat piled in the living room.  


The reclaimed heart pine flooring that we had taken to a local lumber shop to get planed down also arrived.   


So, needless to say, the living room was full of stuff to install!

Before showing pics of the installation of the cabinets, here are some perspective drawings of the kitchen that show the layout of the cabinets and a representation of the finishes and materials used.

North facing view:


I have to mention a small change that has been made since I drew these--the primitive looking shelves next to the pot rack will be an open glass front cabinet instead.  It will save Gabe the time to have to make the shelves and the glass front will be nice, but so would the shelves have been!  Oh well.  Something about having a panel to cover the microwave and side of the cabinet above to give a cleaner look.

East facing view:


South facing view:


We are planning to have stainless steel appliances, a porcelain farmhouse sink, and oil-rubbed bronze hardware.  The countertops will be poured-in-place concrete with a gray/green/blue colorant added.  The backsplash will be in small natural slate pieces in a brick-type pattern, all different sizes.  This is a picture from the manufacturer:


So excited!!  It should look great together.  The fireplace surround will have a dry-stack slate stone like this:


Here is a computer rendering of the fireplace wall:


It won't look exactly like this--it's only a general representation of the space.

This is as close as I could get to an actual shot of the space of the fireplace:


The stone going down in the entry foyer area and both bathrooms is this 12" X 12" natural stone floor tile:

I digress.  More on other finishes later.  Back to cabinets!

The first thing we did upon arrival on Saturday was investigate why the newly installed HVAC unit wasn't working.  We also didn't have power.  Gabe ended up finding one outlet upstairs that was still functioning.  So we promptly plugged in our propane heater because it was cold!!!  Mom & Dad arrived soon after we did and had called our electrician to come over and check out the situation.  Well, come to find out later there was a circuit breaker that burned out due to a stink bug infiltration early on. It's too cold for stink bugs to be around now, but when it was first installed it was much warmer and the little stinkers had better access to it than they do now.  A bunch of them were dead in the electrical box and shorted out the circuit...apparently they were popping like popcorn in there!!!  Must have stunk....

Gotta love those little surprises along the way.  We stuck it out with our little propane heater for one more weekend...  again, back to cabinets.  :)

The guys started by "sorting" the cabinets according to where they belonged in the house.  Additional to the kitchen cabinets, we also bought cabinets for a built-in vanity and linen closet for the upstairs master bath, and one for the upstairs washer/dryer closet.  So they carried the cabinets upstairs and re-arranged the cabinets downstairs so we could start hanging the upper cabinets in the kitchen.  It is better to do the uppers first so that you don't have the lowers in the way while trying to install them.

While they were doing that, I was going around to different spaces and painting on paint color samples to get a feel for the different options I had for each space.  That was fun for me, since I was starting to get to apply the vision for the interiors.  I will share in a different blog post more detail on the inspiration of colors and style of the house.

Here we are getting organized in the kitchen space:


The paint samples are in the upper left hand corner of the picture.  Fyi, neither of them is going to work.  The one on the right is too dark for what I am going for, and the one on the left has too much orange in it and looks neon to me.  They are as follows:


Gabe and Andrew started hanging the left upper corner cabinet first.  It is important to start with the corners first so that you aren't working yourself into a corner with a potential for wrong measurements and ill-fitting cabinets.  They attached the cabinet to the left to the corner piece so they could hang them together more easily.


There is a 2" X 4" temporarily attached to the wall under where the cabinets are being hung to use as a guide and support.


Notice the soffit on the ceiling to guide them.


Is it level?  Plumb?

I also helped them determine the best way the hinge should go, because once it's hung, it can't be changed.

Meet Andrew.

Yes Andrew, we know you're a stud.
That tool Andrew is holding is a "stud finder".  It helps locate studs behind the drywall since the cabinets need to be attached to the studs in order to be sturdy enough to support weight of storage.

Next one goes up:


And then the next one.


This is as far as we can go on this side since we need to wait for the exhaust venting duct for the stove to be installed first before we install the cabinets above the stove.


On this side, there is a 12" next to the window, with a 24" corner cabinet, then a 9" spice pull out cabinet, and lastly a 36" wide cabinet that will be next to the stove/range/microwave.  The wires hanging down are for under-cabinet lighting.

They move to the cabinets on the right side.  First they attach two together:


Then hang them.


One more 12" cabinet and that's all for today.

Next week is all about preparing the wood floors!  Stay tuned....